30 September 2011

Pink Ribbon Flower


October is a month full of birthdays. Think I got about six coming up, including mine! :)

It was middle of the week and I find out that we are invited to two birthday parties on Friday night. It's after work and there is no way I am going to two parties so I decided to send a birthday present to the one that I am missing.

I love wrapping and decorating birthday presents. Who doesn't right? So I bought this really pretty pink ribbon to decorate the present. But once I wrapped the present I realised the ribbon I bought didn't really go with the wrapping paper. It was 10.30 at night. There's no way I'm getting another one. Then I remembered this Ribbon Flower Craft Tutorial I saw on-line and thought maybe I'll give it a try.

All I needed was the ribbon, glue gun, scissors and a ruler. As per the tutorial I cut the ribbon to 6 inches in length but I didn't like it, too short, so I doubled the length and cut it 12 inches in length. It was very easy and quick to make. I used a spare button I got with one of the dresses to finish off the centre of the flower. 

It came out to be very pretty and I love it. Might make another one tomorrow.


28 September 2011

Am so inspired!

One fine weekend, I told one of my friends (a brilliant one he is), my fears of sharing my blog.

I love reading other people's blogs and I love posting the DIY projects in my blog. I love recording all the pictures, the process and the outcome but I am not so sure about other people reading it. I am very new to blogging. I don't even know if I am doing it right!

So he (my friend) sends me this,


It's written exclusively for Webdesigner Depot by Paul Boag. This guy is brilliant!

I love what he wrote about finding inspiration:
One way of doing this is to have a tabloid editor in your head narrating your life in newspaper headlines.

I am so inspired! Worth having a read!

27 September 2011

More Tulips!


I religiously check on my Tulips every morning and I took more photos of them last weekend.

It turns out I got red Tulips too!!!


And I was pleasantly surprised by the pink Tulip bud. So pretty!


Few more photos of the other Tulips.. 


Loving the colours..


26 September 2011

Photo Frame Project

I've been looking for some ideas to decorate the wall of my bed room for quite some time. Ideally I would have liked to buy a beautiful painting and hang it above my bed, BUT the inability of me and my hubby coming into an agreement on what sort of a painting to get and the lack of dollars, I thought let's do some research and do a DIY project, something that won't break the bank.

So one fine morning at work, I needed a distraction from my work load so I was quickly checking out, Fresh Home Ideas and I came across this 6 fun photo projects.


I absolutely love the gallery style photo walls but the shape of the heart yelled out "unique! unique! unique!". I immediately emailed the picture to my other half and to my utmost surprise he agreed! I did send couple of follow through emails saying,
 "are you sure?"
"not too novelty?"
"not too girly?"

but he said he likes it!

Okay now this is what my bedroom looked before. I painted a feature wall in our bedroom to match the feature tiling in the en-suite bathroom. Worked out pretty well.


I counted the frames in the picture and there were 36 frames. I had to do this project on a budget, so I did some research and I came across these in IKEA. They were perfect!


I bought myself 12 packs of frames and some 3M hooks to hang them in because there is no way I would drill 36 holes on the wall. The 3M hooks were $8 a pack and there were 20 hooks in the pack. Brilliant find!


I  started unpacking the frames and starting laying them on the bed to see if it really comes out to look like a heart.


It sort of does..


Awwwwww and this is my poor hubby holding his shin. I was too short to take an overall photo of the frames on the bed so I asked him to give me a lift. One thing led to another and we both fell and he hit his shin on the edge of the bed. Not too hard but he is known to be a teeny bit of a drama queen.. Had to capture the moment :)


I didn't quite like the look of the raw pine against the grey wall so I thought it would be good to paint them black. After a quick trip to Bunnings and a black paint for $10, I painted all the frames in black.


The weekend after, it was the 'hanging time'. I haven't really worked out what photos I am going to put the frames so I thought I'll hang the empty frames for the time being. 

I marked the centre point of the bed head with a painters tape..


I used blue tac to stick the frames to the wall before I used the 3M hooks because it allowed me to play around with the spacing to get the shape right. I also stuck a piece of painters tape on the blu tac that's in the middle so when I stick it on the wall, it will mark where I need to stick the 3M hooks.


After the first half I couldn't help admiring how it was turning out.


and Ta Da!!!!!!!!!! My own picture frame heart wall!!!!!!


How much did it cost me?
12 packs of picture frames:  $36
2 packs of 3M hooks:  $16
Blue tac:  $2
Black paint: $10

A total of $64! That's not bad :)

Now all I need is to put together 36 pictures to put in the frames :):):)

22 September 2011

Tulips!


I took a few pictures of my Tulips over the weekend. They seem to be blooming very happily right outside my bedroom window.

I've never grown Tulips before and knew nothing about them. Thanks to my colleague at work who went on and on about and how Tulips are grown out of bulbs and how you have to dig the bulbs out of the ground after they flower etc etc etc.. I was fascinated! I didn't know Tulips grow out of bulbs! I wanted to try it out! I bought some bulbs from K-mart and planted them end of autumn.

And now I'm in love...


They are so gorgeous and very exciting to watch them grow each day.. They started growing very quickly once the Spring hit and it's amazing to watch the buds grow wraps around the leaves..


I bought mixed colour pack so I didn't know what colours I was buying when I bought the bulbs.. So far I got yellow and pink and white border..


I bought the two potted Tulips when I visited the Tulip Festival last Saturday.. Love the colours..


21 September 2011

Placemat Quick Fix


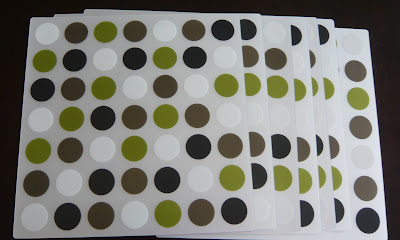
It was one of those days that I did not feel my 100% self to go to work so I took the day off for a break and to spend some time at home. I was clearing some mess on the dinning table when I noticed that the new IKEA placemats are actually leaving scratch marks on my dinning table I bought not too long ago! I was quite displeased. I bought placemats for $1.99 each and I love love love the colours. I did not want to get rid of them.


I bought some floor protectors from IKEA the week before and I started sticking them on to dinning chairs so they won't scratch the tiled floor and that's when it hit me! I can do the same thing for my placemats! Well.. not with floor protectors.. I thought maybe I could get something similar to protect the table surface.. 

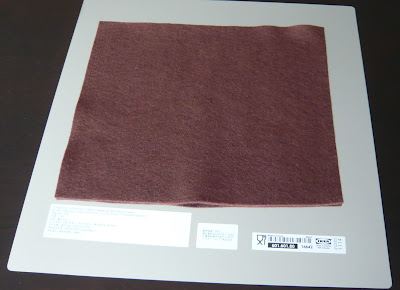
I went to Spotlight and found these Felt squares for 99c each and they were perfect to stick on the back of placemats.


I made some cuttings so that I can spread more fabric around the place mat..


and glued it all in.


Its all very simple and easy..


But it's doing the job perfectly! and it didn't break the bank!


See what I meant about not wanting to get rid of the placemats.. They are soooooo pretty!


And say hi to my new indoor plant, Maiden hair, I am absolutely in love with, in my new plant pot I bought from IKEA :)


And they are all sitting in my dinning area very happily :o)